Search
For The Answer
Click here to access our database of
Plant Answers
Search
For The Picture
Click here to access the Google database of plants
and insects
Information
Index
Alphabetical Listing of Topics, Recommendations
and Plants
- Turf Grass & Sod
- Milton Glueck, Host of Milberger's Gardening Show
- Arcadia
Archives -
Greg Grant - Friends of PLANT Answers
Milberger's Nursery and Landscaping
3920 North Loop 1604 E.
San Antonio, TX 78247
210.497.3760
nursery@milbergersa.com
Open 9 to 6 Mon. through Sat.
and 10 to 5 on Sun.

Three exits east of 281, inside of 1604
Next to the Diamond Shamrock station
Please click map for more detailed map and driving directions.


| Efficient Use of Water in the Garden and Landscape Jerry Parsons, Extension Horticulturist Sam Cotner, Head of Horticulture Department Roland Roberts, Extension Horticulturist Calvin Finch, San Antonio Water System Doug Welsh, Extension Horticulturist Larry Stein, Extension Horticulturist During 1984, an estimated 1.25 million acre feet of water were used by Texans in the care and maintenance and residential landscapes. Texas is expected to soon become the second most popular state in the U.S. with two-thirds of the population located in urban/suburban areas. With this growth, conservative estimates indicate water needs will increase 75 percent by the year 2000. Thus, conservation, reclamation and efficient use of water resources will become increasingly important. Essentially all water used in Texas is derived from precipitation. Part of the precipitation flows into streams, ponds, lakes and reservoirs, and some of this eventually reaches the Gulf; another portion infiltrates the soil to the rooting zone of plants; a third portion percolates below the rooting zone and becomes groundwater. Surface water sources are recharged rapidly, but groundwater reservoirs such as the Ogallala Aquifer, are recharged very slowly. The Ogallala Aquifer is slowly being exhausted in some areas of heavy pumping. The proportion of precipitation received in Texas that is returned to the atmosphere as water vapor is estimated to be 70 percent from non-irrigated land areas and 2 percent from irrigated areas. Most of this loss represents evaporation or transpiration from plant surfaces. Efficient, Responsible Water Use Plants, Soils and Water When water is applied to the soil it seeps down through the root zone very gradually. Each layer of soil must be filled to "field capacity" before water descends to the next layer. This water movement is referred to as the wetting front. Water moves downward through a sandy coarse soil much faster then through a fine-textured soil such as clay or silt. If only one-half the amount of water required for healthy growth of your garden or landscape is applied at a given time, it only penetrates the top half of the root zone; the area below the point where the wetting front stops remains dry as if no irrigation has been applied at all. Once enough water is applied to move the wetting front into the root zone, moisture is absorbed by plant roots and moves up through the stem to the leaves and fruits. Leaves have thousands of microscopic openings, called stomates, through which water vapor is lost from the plant. This continual loss of water called transpiration, causes the plant to wilt unless a constant supply of soil water is provided by absorption through the roots. The total water requirement is the amount of water lost from the plant plus the amount evaporated from the soil. These two processes are called evapotranspiration. Evapotranspiration rates vary and are influenced by day length, temperature, cloud cover, wind, relative humidity, mulching, and the type, size and number of plants growing in a given area. Water is required for the normal physiological processes of all plants. It is the primary medium for chemical reactions and movement of substances through the various plant parts. Water is an essential component in photosynthesis and plant metabolism, including cell division and enlargement. It is important also in cooling the surfaces of land plants by transpiration. Water is a primary yield-determining factor in crop production. Plants with insufficient water respond by closing the stomata, leaf rolling, changing leaf orientation and reducing leaf and stem growth and fruit yield. WATER QUALITY Not all water is suitable for use as an irrigation source. Prior to implementing an irrigation system, the water source should be tested for water quality. The instructions for testing and the testing results may be obtained from the Texas Agricultural Extension Service or an independent water lab. The results of the test will determine if the water is suitable for irrigation or reveal if any special tactics will be required to overcome quality deficiencies. Major factors in determining water quality are its salinity and sodium contents. Salinity levels are expressed as categories based on conductivity. Category C-1 represents a low salinity hazard. Water in this category has a conductivity of less than 2.5 millimhos/cm. It can be used for most crops without any special tactics. Category C-2 reflects salinity that results in a conductivity of 2.5 - 7.5 millimhos/cm. The water in this category can be used for tolerant plants if adequate leaching occurs. Category C-3 is high salinity water that has conductivity in the 7.5-22.5 millimhos/cm range. It can not be used effectively on poorly drained soils. On well drained, low salt soils the water can be used for salt tolerant plants if it is well managed. Category C-4 water is very high salinity and cannot be used for irrigation on a regular basis. Sodium is a major component of the salts in most saline waters but its impact can be detrimental to soil structure and plant growth beyond its status as a component of salinity. The level of sodium (Na) in irrigation water is another important factor of quality. Table 1. Determination of soil moisture content.
Sodium levels are expressed as categories based on concentration and impact on soils. The S-1 category denotes low-sodium water. Water in this category can be used for most plants without any special tactics. S-2 water has a medium level of sodium. Its use may be a problem on some fine textured soils. S-3 water has high levels of sodium and will produce harmful effects in most situations. Sometimes it is useful on soils with high gypsum levels and in low salinity situations where it can be chemically treated. S-4 water has very high sodium levels and is generally unsatisfactory as irrigation water. IRRIGATION TIMING There are critical growth periods when water stress is most detrimental. It is imperative that a good moisture supply be maintained during seed germination and seedling emergence from the soil. Water transplants immediately. Many shallow-rooted plants and newly planted trees and shrubs suffer water stress. Wilting followed by browning leaf tips and edges are signs of water stress. To determine if irrigation is needed, feel the soil in the soil zone where most roots are located. Table 1 explains how to determine the soil's moisture by feel. As you gain experience feeling the soil and observing plant symptoms, it will help you time irrigations. WATERING TECHNIQUES Proper watering methods are seldom practiced by most gardeners. They either under- or over water when irrigating. The person who under-waters usually doesn't realize the time needed to adequately water an area; instead he applies light, daily sprinklings. It is actually harmful to lightly sprinkle plants every day. Frequent light applications wet the soil to a depth of less than 1 inch. Most plant roots go much deeper. Light sprinkling only settles the dust and does little to alleviate drought stress of plants growing in hot, dry soil. Instead of light daily waterings, give plants a weekly soaking. When watering, allow the soil to become wet to a depth of 5 to 6 inches. This type of watering allows moisture to penetrate into the soil area where roots can readily absorb it. A soil watered deeply retains moisture for several days, while one wet only an inch or so is dry within a day. In contrast, there are those who water so often and heavily that they drown plants. Symptoms of too much water are the same as for too little. Leaves turn brown at the tips and edges, then brown all over and drop from the plant. These symptoms should be the same, since they result from insufficient water in the plant tissue. Too much water in a soil causes oxygen deficiency, resulting in damage to the root system. Plant roots need oxygen to live. When a soil remains soggy little oxygen is present in the soil. When this condition exists roots die and no longer absorb water. Then leaves begin to show signs of insufficient water. Often gardeners think these signs signal lack of water, so they add more. This further aggravates the situation and the plant usually dies quickly. Thoroughly moisten the soil at each watering, and then allow plants to extract most of the available water from the soil before watering again. MULCHING A mulch is a layer of material covering the soil surface around plants. This covering befriends plants in a number of ways. It moderates soil temperature, thus promoting greater root development. Roots prefer to be cool in summer and warm in winter. This is possible under a year-round blanket of mulch. Mulch conserves moisture by reducing evaporation of water vapor from the soil surface. This reduces water requirements. Mulching prevents compaction by reducing soil crusting during natural rainfall or irrigation. Falling drops of water can pound the upper 1/4 inch of soil, especially a clay soil, into a tight, brick-like mass that retards necessary air and water movement to the root zone. Most weed seeds require light to germinate so thick mulch layer shades them and reduces weed problems by 90 percent or more. Any plant material that is free of weed seed and not diseased is suitable for mulch. Weed-free hay or straw, leaves, grass clippings, compost, etc., are all great. Fresh grass clippings are fine for use around well-established plants, but cure them for a week or so before placing them around young seedlings. Mulch vegetable and flower gardens the same way. First get plants established, then mulch the entire bed with a layer 3 to 4 inches thick. Work the mulch material up around plant stems. Organic mulches decompose or sometimes wash away, so check the depth of mulches frequently and replace when necessary. Recent research indicates that mulching does more to help newly planted trees and shrubs become established than any other factor except regular watering. Grasses and weeds, especially bermuda grass, which grow around new plants rob them of moisture and nutrients. Mulch the entire shrub bed and mulch new trees in a 4-foot circle. IRRIGATING METHODS Four distinct methods of irrigating are sprinkling, flooding, furrow-irrigation and drip irrigation. Consider the equipment and technique involved in each method before selecting the "right" system. Select a system that will give plants sufficient moisture without wasting water. Hose-end Sprinkling Sprinkler irrigation, or "hose-end overhead sprinkling" as it is sometimes called, is the most popular and most common watering method. Sprinkler units can be set up and moved about quickly and easily. They are inexpensive to buy, but if used incorrectly they can be extremely wasteful of water. Sprinkler equipment varies in cost from a few dollars for a small stationary unit to $50 or more for units that move themselves. A solid-set sprinkler system for a small garden could cost more than $100, although it is not necessary to spend that much. The best investment is an impact-driving sprinkler than can be set to water either a full or partial circle. Sprinkler irrigation has its advantages. The system can be used on sloping as well as level areas. Salt does not accumulate because water percolates downward from the surface carrying salts with it. Different amounts of water can be applied to separate plantings to match plant requirements. However, there are some drawbacks. Use sprinkler irrigation early in the day to allow time for the soil surface to dry before nightfall. Irrigation in a wind of more than 5 miles per hour distributes the water unevenly. If you have poor quality water, the mist which dries on leaves may deposit enough salt to injure them. Strong winds may carry the water away to neighbors' yards. Some water also is wasted by attempting to cover a square or rectangular area with a circular pattern. Move the sprinkler unit at regular intervals if the garden is larger than the sprinkler pattern. With caged tomatoes or trellised crops, set the sprinkler on a stand to allow the spray to arch up and over the top of the leaf canopy. Improper timing and operating in wind or at night can damage plants and waste water. Flood Irrigation Flooding is one of the oldest irrigation methods. It is often used in areas with extreme summer heat, especially in large farming operations. It can also be used in the home garden. First, a shallow dam is raised around the entire perimeter of the area to be watered. Then, water is allowed to flow over the soil until the dammed area is completely covered. Beneficial flooding is possible only if the area is level and the soil contains enough clay to cause the water to spread out over the surface and penetrate slowly and evenly. The soil must not remain flooded with water for more than a few hours. Flood irrigation is useful where alkaline water causes a buildup of salts to toxic levels in the soil. Flooding leaches (flushes down) these excess soluble salts out of the soil. It is best to do this type of flooding before spring fertilizing, tilling and planting. However, flood irrigation has its drawbacks. It can waste water because it is easy to apply much more water than is required to meet normal plant needs. Runoff is hard to avoid. Also, rapidly growing plants are injured by the low oxygen level present (oxygen starvation) in flooded soil, and fruits resting on flooded soil stay wet, often rotting as a result. Furrow Irrigation Furrow irrigation is a popular method of applying water, primarily to vegetable gardens. Successful furrow irrigation requires soil with enough clay so that water flows along shallow ditches between the rows and sinks in slowly. The water must reach the low end of the rows before much has soaked in at the high end. Many sandy or open soils are so porous that water seeps in too quickly, never reaching the end of the row. To solve this problem, use short rows in gardens with sandy soil. Most gardens can be irrigated easily with the furrow method by using a hoe or shovel to make shallow ditches. To test furrow irrigation, make one shallow ditch from end to end and run water down it. If the water runs 20 to 30 feet in a few minutes, that's fine. If the water sinks in too fast at the high end, divide the garden lengthwise into two or more runs and irrigate each run separately. Make a serpentine ditch to guide the water up and down short rows in small gardens on level ground. The number of rows which can be irrigated at the same time depends on the volume of water available and your ingenuity. Leaves and fruit of erect plants such as beans and peppers will stay dry during furrow irrigation. New seedlings can be watered by running water as often as needed to keep the seedbed moist. The surface soil of a raised bed does not pack as with sprinkler irrigation, so there is less crusting. Only a hoe or shovel and a length of hose are needed to get the water from the house faucet to the garden. But, furrow irrigation does have some disadvantages. Mature
fruits of vine and tomato crops usually rest on the soil. Some
will become affected with a soil rot after repeated Drip Irrigation Trickle or drip irrigation is an improvement over all the above as a watering technique. It applies a small amount of water over a long period of time, usually several hours. This is discussed in detail later in this publication. USING WATER AROUND HOME TREES AND SHRUBS Grass and/or weeds growing under and around trees and shrubs compete for the same nutrients and water. When summer rainfall is low and less than adequate watering occurs, competition for water and nutrients imposed by weeds or grass substantially reduced tree growth, bud development and fruit size. When competition from grass is eliminated, roots are more evenly distributed, root numbers increase and they utilize a larger volume of soil. Effective soil utilization by a large root system means that fertilizer and moisture will be used more efficiently. Remove grass and/or weeds from beneath newly planted trees and shrubs as soon as possible. The longer turfgrass grows under trees and shrubs, the greater the reduction of new growth. There is also a cumulative effect which may decrease tree growth for several years. For instance, if the growth of a tree is reduced by 20 percent for one year because of grass competition, the growth automatically is 20 percent less during the second year's growth. Grass competition reduces growth by as much as 50 percent. If trees and shrubs are surrounded closely by tenacious grasses such as bermuda, remove or kill the turf. The safest grass killer for use near young trees and shrubs is glyphosate, which is sold as Roundup, Kleenup, Doomsday or Weed and Grass Killer. This herbicide totally eliminates grasses and roots, yet is inactivated upon soil contact. Use a piece of wood, cardboard, etc, as a shield to prevent spray droplets from touching trunks or foliage of desirable plants. Use only the amount of glyphosate suggested on the product label. Trees need a deep, thorough soaking once a week in the growing season, either from natural rainfall or supplemental irrigation. When irrigating, be thorough and allow the water to penetrate deeply. To water large trees let water flow slowly onto an area under the dripline of the tree for several hours. Professionals indicate that large trees require more deep watering than homeowners can imagine. Remember that watering which is adequate for lawn grasses growing under trees is not adequate for actively growing trees. Young and mature pecans, which are popular lawn trees in many areas, respond positively to irrigation. Irrigation can be very beneficial if not necessary, in June, July, and August. Irrigation often means the difference between a marketable and unmarketable product. A dry June and July may cause many or all nutlets to drop. Drought during July and early August can decrease nut size. Pecans fill during August and September. Drought during three months may cause nuts that are poorly filled. A dry September and October may prevent shuck opening and cause a high proportion of "sticktights". Drought-induced sticktights can be a serious problem.
A guide for young tree irrigation is shown in Table 2. If soil drainage is poor, apply 50 percent of this volume. All bearing pecan trees respond positively to irrigation. In general, pecans in good soil bear with only 32 inches of rainfall from August to October. However, more water increases tree health and regular production. Table 2. Average weekly water requirements in gallons per tree.
Pecans require 1 inch of water each week from April to October; the optimum amount is 2 inches per week. A bearing pecan tree has its greatest water needs during the following periods: March, immediately before growth begins. Severe drought during one of these four periods can cause complete crop failure or serious loss. If these occur during the last period, a poor crop results the following year. Pecan roots can dry out and die if no rain occurs from September to April. Therefore, consider a mid-winter irrigation to ensure good tree health and regular production. LAWNS Water needs vary considerably among the turfgrasses. Consider this when establishing a lawn, for it may significantly reduce irrigation needs during the summer. Of the common turfgrasses tall fescue requires the most water and buffalo-grass the least. St. Augustine, hybrid bermuda grass and common bermuda grass have intermediate water needs. Lightly water newly seeded or sprigged lawns at frequent intervals. Keep the seed or sprigs moist but not saturated during this initial growth period. This may require watering four or five times on hot, windy days. The first 10 days to 2 weeks are especially critical. If young plants dry out, they may die. After a couple of weeks root system development should be well under way and the watering frequency can be slowly reduced. At about 1 month after seedling or sprigging the lawn it should be treated as an established lawn. Purple or red colored bermuda grass may indicate seedlings are overwatered. If this occurs, reduce watering and plants usually recover. Water newly sodded lawns much like established lawns except more frequently. After the sod is applied, soak it with enough water so that the soil under the sod is wet to a depth of 2 to 3 inches. Each time the sod begins to dry out, resoak it. Roots develop fairly rapidly and within 2 weeks or so the sod can be treated like an established lawn. Ideally, a lawn should be watered just before it begins to wilt. Most grasses take on a dull purplish cast and leaf blades begin to fold or roll. Grass under drought stress also shows evidence of tracks after someone walks across the lawn. These are the first signs of wilt. With careful observation and experience, one can determine the correct number of days between waterings. Common bermuda grass lawns can go 5 to 7 days or longer between waterings without loss of quality. Early morning is considered the best time to water. The wind is usually calm and the temperature is low so less water is lost to evaporation. The worst time to water is late evening because the lawn stays wet all night, making it more susceptible to disease. When watering a lawn, wet the soil to a depth of 4 to 6 inches. Soil type affects the amount of water needed to wet soil to the desired depth. It takes about 1/2 inch of water to achieve the desired wetting depth if the soil is high in sand, and about 3/4 inch of water if the soil is a loam. For soils high in clay, an inch of water is usually necessary to wet the soil to the desired depth. If waterings are too light or too frequent the lawn may become weak and shallow-rooted, which in turn makes it more susceptible to stress injury. Use the following steps to determine the amount of water your sprinkler or sprinkler system puts out and check its distribution pattern at the same time.
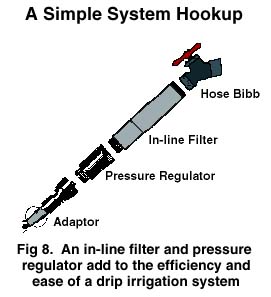
Many soils will not take an inch of water before runoff occurs. If this is a problem with your lawn, try using a wetting agent, also called a surfactant, which reduces the surface tension of water making it "wetter." This "wetter" water runs into the soil at a faster rate and goes deeper than water in a non-treated soil. There are a number of wetting agents available; apply them according to directions on their labels. If this does not solve to runoff problem, it may be necessary to apply 1/2 inch one day and 2 inch the next day. VEGETABLE GARDENS Generally speaking, if you keep your tomatoes happy, the rest of the vegetables will receive enough water. Obviously, irrigating a garden containing many kinds of vegetables is not simple. Early in the season when plants are young and have small root systems, they remove water from the soil near the center of the row. As the plants grow larger, roots penetrate into more soil volume and withdraw greater quantities of water faster. In sandy loam soils, broccoli, cabbage, celery, sweet corn, lettuce, potatoes and radishes have most of their roots in the top 6 to 12 inches of soil (even though some roots go down 2 feet) and require frequent irrigation of about 3/4 to 1 inch of water. Vegetables which have most of their root systems in the top 18 inches of soil including beans, beets, carrots, cucumbers, muskmelons, peppers and summer squash. These vegetables withdraw water from the top foot of soil as they approach maturity and can profit from 1 to 2 inches of water per irrigation. A few vegetables, including the tomato, cantaloupe, watermelon and okra, root deeper. As these plants grow they profit from irrigations of up to 2 inches of water. For fruiting crops, the most critical growth stage regarding water deficit is at flowering and fruit set. Moisture shortage at this stage may cause abscission of flowers or young fruits, resulting in insufficient fruit for maximum yield. The longer the flowering period, the less sensitive a species is to moisture deficits. For example, the relative drought resistance of beans during flowering and early pod formation is the result of the lengthy flowering period --30 to 35 days with most varieties. Slight deficits during part of this period can be partially compensated for by subsequent fruit set when the water supply is adequate. More determinate crops such as corn or processing tomatoes are highly sensitive to drought during the flowering period. In terms of food production, the period of yield formation or enlargement of the edible product (fruit, head, root, tuber, etc.) is critical for all vegetables and is the most critical for non-fruiting crops. Moisture deficits at the enlargement stage normally result in a smaller edible portion because nutrient uptake and photosynthesis are impaired. Irrigation, especially over irrigation during the ripening period may reduce fruit quality. Ample water during fruit ripening reduces the sugar content and adversely affects the flavor of such crops as tomatoes, sweet corn and melons. Moisture deficits at ripening do not significantly reduce yield of most fruit crops, irrigate at this time with extreme caution. DRIP IRRIGATION FOR THE HOME LANDSCAPE, GARDEN AND ORCHARD One of the best techniques to use in applying water to home landscapes, gardens and orchards is drip irrigation. This is the controlled, slow application of water to soil. The water flows under low pressure through plastic pipe or hose laid along each row of plants. The water drops out into the soil from tiny holes called orifices which are either precisely formed in the hose wall or in fittings called emitters that are plugged into the hose wall at a proper spacing. Use drip irrigation for watering vegetables, ornamental and fruit trees, shrubs, vines and container grown plants outdoors. Drip irrigation is not well suited for solid plantings of shallow-rooted plants such as grass and some ground covers. The basic concepts behind the successful use of drip irrigation are that soil moisture remains relatively constant, and air, as essential as water is the plant root system, is always available. In other watering methods there is an extreme fluctuation in soil water content, temperature and aeration of the soil. Soil, when flooded or watered by sprinkler, is filled to capacity. It is then left to dry out, and often it is not until the plant begins to show signs of stress that it is watered again. When the soil is saturated in this way, there is little or no available oxygen; at the end of the cycle there is insufficient water. Drip irrigation overcomes this traditional watering problem by keeping water and oxygen levels within absorption limits of the plants. It frequently (even daily) replaces the water lost through evaporation and transpiration (evapotranspiration). In addition to maintaining ideal water levels in the soil, this also prevents extreme temperature fluctuations which result from wet-dry cycles associated with other watering methods. With proper management, drip irrigation reduces water loss by up to 60 percent or more as compared to traditional watering methods. These methods deliver water at a faster rate than most soils can absorb. Water applied in excess of this penetration rate can only run off the surface, removing valuable topsoil and nutrients. With drip irrigation the water soaks in immediately when the flow is adjusted correctly. There is neither flooding nor run-off, so water is not wasted. With a properly used drip irrigation system, all of the water is accessible to the roots. Watering weed patches, walkways and other areas between plants and row is avoided. Wind does not carry water away as it can with sprinkler systems, and water lost to evaporation is negligible. Drip irrigation requires little or no time for changing irrigation sets and only about half as much water as furrow or sprinkler irrigation because water is delivered drop by drop at the base of the plants. Water shortage and high energy costs motivate gardeners to harvest the greatest possible yield from every precious drop of water. If you have shied away from installing a drip irrigation system because it looked too complicated or too costly, this publication explains how to have one easily and economically. The financial investment is reasonably small if you are willing to spend a few hours to plan, assemble and install the system. Savings in water combined with increased yield and quality of vegetables and flowers more than pays for the cost of parts to maintain a drip system. The life of a drip system is extended by proper design, proper filtering, avoiding puncture with tillage tools, mulching over plastic lateral driplines to shield them from sunlight, and flushing and draining lines and storing system components inside a warm building before hard freezing temperatures arrive. The 3- to 5-gallons-per-minute flow from a typical house faucet limits the area which can be adequately irrigated to usually not more than 1,500 to 2,000 square feet. From $15 to more than $30 per 100 feet of row can be spent for equipment in an average sized home garden, depending on whether it is simple or has fancy automatic controls, pressure regulators and fertilizer injectors. As with most tools and machines, the simpler the better. The two basic kinds of drip irrigation systems which have worked best for Texas growers are the two-channel plastic tubing represented by IRS Bi-Wall and Chapin Twin-Wall, and the plastic pipe with insert emitters represented by Submatic, Melnor Tirosh, Spot, Microjet and many others. The emitters are made by cutting 1-foot lengths of microtubing. When planning a drip system, consider your needs, one at a time:

Most water does not contain enough salt to be injurious to plants. However, irrigation water adds salt to the soil, where it remains unless it is removed in drainage water or the harvested crop. When the amount of salt added to the soil exceeds the amount removed, salt accumulates until the concentration in the soil may become harmful to plants. The principal effect of salinity is to reduce the availability of water to the plant; however, certain salts or ions may produce specific toxic effects. Poor quality irrigation water containing moderate amounts of salt often can be used more successfully with drip irrigation than with sprinkler or surface irrigation. Less total salt is added with drip irrigation since less water is applied. In addition, a uniformly high soil moisture level is maintained with drip irrigation, which keeps the salt concentration in the soil at a lower level. Salts accumulate in the soil around the edges of the west area under drip irrigation emitters, and some leaching (removal of salts with drainage water) may be required. Sufficient rainfall is received in much of the state to accomplish any required leaching of salts. However, extra irrigation water may be required in some areas to leach accumulated salts from the root zone. Operating the system when the crop's water requirement is low can probably accomplish required leaching of salts in most cases.
If fruit and ornamental trees are to be drip-irrigated, use insert emitters. The number of emitters per tree or plant depends on plant size. A large fruit or ornamental tree having a canopy spread of 15 feet or more in diameter needs six emitters. A smaller tree or shrub needs one emitter for each 2 1/2 feet of canopy diameter. The number of emitters multiplied by the rated output per emitter gives the flow rate needed to irrigate all the trees and shrubs simultaneously. For example, if there are 12 trees on which 72 emitters will be used, each with a rated output of 1 gallon per hour at 15 pounds per square inch, the flow rate will be 72 gallons per hour or 1.2 gallons per minute. A 1/2 inch main line is sufficient according to the following guidelines. Make a sketch of the area to be irrigated. Use graph or grid paper to draw the area's shape using a scale of 1 inch to 5 to 10 feet. Measure the length and width of the area. The distance from the water source to the edge of the area to be irrigated is the length of garden hose or plastic pipe needed to connect to the irrigation system. Draw in the actual lines of drip hose required. If planning a garden, a drip hose will be run down each row. Count the number of rows and multiply the number of major rows by the row length to get the total length of drip hoses needed. If you run several rows close together (only a few inches apart) to create a bed culture, consider using one drip hose if it is up to 18 inches wide and two drip hoses if it is 24 to 36 inches wide. If wide beds are used for planting flowers, use one drip hose every 18 inches. Other helpful facts involve the direction of downward slope in the garden and the gallons per minute delivered by your faucet. Use a container of known volume, such as a 5-gallon pail, and a watch to estimate gallons per minute. INSTALLING A DRIP SYSTEM When buying irrigation equipment avoid mixing brands of fittings, hoses and emitters unless they are compatible. The design and installation of Bi-Wall and Twin-Wall drip tubing and the design and installation of Submatic, Melnor, Spot and Microjet emitter systems are discussed separately so that the instructions are easier to understand. Table 3. Plastic line sizes for lengths less than 100 feet.
When planning a Bi-Wall or Twin-Wall system, use a 1/2-inch (16 millimeter) main water supply plastic hose (header) to feed the water into the drip tubing which runs alongside each row. Most house faucets supply enough water to run 200 to 300 feet of drip tubing at once. Divide irrigation systems for larger areas into two or more sets when the water volume is insufficient to cover the whole area at once. Parts needed for a drip tubing system with a header are a hose long enough to reach from the house faucet to the header, a 1/2-inch female hose connector, a 1/2-inch diameter header long enough to connect all the drip tubes, an ear tee for each drip tube, a drip tube for every row, a nylon string or strong wire to tie the ends of the drip tubing and a sharp knife. When a header is used, begin the installation by running a hose from the house faucet to a female hose connector which is installed in the end of the header closest to the faucet. The other end of the header is plugged or folded back and tied off. Be sure the header spans the entire width of the area to be irrigated on the high side. Place the correct lengths of Bi-Wall drip tubing along each row. Plan rows to make the best use of water. Small plants such as carrots, onions, radishes, lettuce, bush beans, etc., can be double-rowed; that is, seed can be planted on each side of the drip tubing. To join the Bi-Wall tubing to the header pipe (the main water supply), use a connecting attachment called an ear tee. At each row, punch a small hole in the side of the 16-millimeter header tubing facing down the row. Use a blunt eight penny nail to punch the holes. Push the ear tee into the hole and wrap the two ears around the header. To secure the far end of the Bi-Wall, fold back 2 inches and tie with a string. If the water contains sand or dirt particles, screw a filter to the hose connector as sand particles and other trash can clog openings in the Bi-Wall tubing. All of the drip irrigation fittings are connected to the plastic tubing in the same manner. For the hose connector, push the 16-millimeter header over the shaft and under the locking collar. When the header is as far as you can push it, pull back on the tubing. This binds the tubing under the locking collar. To disassemble, reverse the procedure. For installing Bi-Wall tubing, push it on the ear tee as far as it will go; push the collar outward, then grasp the Bi-Wall tubing and pull back on it while holding the ear tee in place with the other hand. This binds the Bi-Wall tubing under the locking collar. Note the difference in the locking collar for the Bi-Wall and the header. If irrigating only one row with Bi-Wall, put a wide Bi-Wall collar on the hose connector, install it in the Bi-Wall and fasten it to a water hose or faucet just as for the header. It may be necessary to twist the locking collar to allow the Bi-Wall to go all the way up.) Work the locking collar down on the Bi-Wall, then hold the ear tee in one hand and pull on the Bi-Wall tubing with the other hand. If it leaks around the collar on the ear tee, push the Bi-Wall farther up on the eat tee, twist the locking collar again and pull on the tubing. The notch on the collar should be over the top of the Bi-Wall. The second type of drip irrigation system involves the use of insert emitters. When designing a drip system with insert emitters, strive to have the same amount of water flowing out of all emitters in the system. Secondly, have the flow rate regulated so that water drips into the soil without puddles forming on the surface. Insert emitter systems are ideally suited for irrigating trees, which are planted farther apart than garden crops, flowers or shrubs. Trees previously irrigated by the other methods change their root systems when drip irrigation is used. New feeder roots concentrate near the emitters and become major suppliers. It is best to start drip irrigation at the beginning of spring growth to allow time for new roots to develop before hot weather arrives. If drip irrigation is initiated in midsummer, an occasional supplemental irrigation by the old method is recommended to avoid plant stress. Soil texture is of primary importance in the design and use of drip irrigation. It directly affects the number or placement of emitters. In sandy soil where spaces between sand grains are relatively large, gravitational forces affect water movement more than capillary action. As a result, water moves down rather than laterally through the soil. In finer soils such as clay, capillary action is much stronger and water spreads laterally before penetrating very deeply. An emitter in sandy soil will water an area with a diameter of about 15 inches, while in clay soil the same emitter will water an area up to 2 feet in diameter. Since the same amount of water is released in both cases, the sandy soil obviously receives deeper watering than the clay. The following chart on emitter placement suggests a 1-gallon-per-hour emitter at the base of the plant, assuming you have a low shrub in sandy soil. In fact, placing two 1/2-gallon emitters, each about 9 inches from the base, increases the area of coverage while using the same amount of water. Increasing the wet area encourages wider development of the root system, and watering time is reduced somewhat. However, remember that smaller volume emitters clog more easily than larger volume emitters. When working with vegetable crops and sandy soil, use closer spacing (12 inches) to ensure that all shallow roots receive sufficient moisture. With finer soils, use greater distances between emitters while still ensuring proper coverage. To get a better idea of soil structure experiment with slow water applications to observe lateral movement and depth of water penetration. Observe the application rate and time so better decisions on emitter placement, as well as watering practices, can be made. Be sure that a sufficient percentage of the root zone is watered. Shallow root zones require emitters with closer spacing; deep roots allow wider spacing. The widest spacing to use safely on vegetables and ground cover is closer than the narrowest required by tree crops. This is shown in the table on the number and placement of emitters. Water quality may be a factor in emitter location since salts concentrate at the edges of the wet area. It may be necessary to locate emitters so that wet areas overlap the tree trunk to prevent harmful salt accumulations near the trunk. A popular emitter arrangement for large trees such as pecans uses a loop which circles the tree between the trunk and the dripline. The lateral pipeline which carries water along each row of trees is under ground. A 1/2-inch or 3/8-inch polyethylene pipe connected to the lateral near each tree extends to the soil surface and circles the tree. The tree loop is usually 6 to 12 feet long initially and contains one or two emitters. Additional lengths of pipe 8 to 12 feet long, each containing another emitter, are connected to the initial loop as the trees grow and require more water. Large pecan trees may require tree loops with five to nine emitters. In-line emitter arrangements have been used satisfactorily for smaller trees such as apples, peaches and citrus. Install two or four emitters in the lateral so that wet areas overlap in line with the tree row. Emitter selection and performance are keys to the success of all drip irrigation systems. Some emitters perform satisfactorily underground while others must be used only above ground. Emitter clogging is still a major problem in drip irrigation. Emitter openings must be small to release small amounts of water, consequently, they clog easily. Table 4. Selection, number and spacing of emitters and orifices.
Emitters are more easily observed, cleaned and oriented near the tree when they are located on the soil surface, although drip systems with underground emitters are out of the way. Some emitters can be flushed easily to remove sand or other particles which cause clogging, while others are more difficult to clean. The flexibility of a drip irrigation system makes it ideal for most landscapes. When native plants are transplanted they often require watering for the first year or so until they establish a root system. After that they usually survive on natural rainfall. As plants grown and watering needs increase, more emitters can be installed very easily. Or, 1 gallon emitters can be replaced with 2- or 4-gallon-per-hour emitters. In landscaping, plants with different watering requirements must frequently be mixed together. Some ornamentals require occasional deep watering, while others prefer more frequent shallow watering. Differing needs can be satisfied through the number or size of emitters by placing either a greater number of emitters or by using emitters with a greater flow rate for plantings requiring extra water. In clay soils it is best to increase the number of emitters rather than the rate of flow since soil density limits absorption rates. Once the system is set up this way, maximum benefit for all plants is achieved by several shallow waterings--leaving the water on for a short time (20 minutes to 2 hours) with an occasional deep watering (several hours) as needed, depending on season, plants and soil type. Burial of the drip system is usually preferred by landscapers and ornamental gardeners. Generally 3 to 4 inches deep is sufficient. This not only hides the tubing from view but also adds to the system's life expectancy. Most emitters can also be buried, but check them occasionally. Rodent damage (sometimes they chew through the tubing) and accidental damage from shovels or tillers are problems associated with buried systems. Repairing cut or punctured laterals is easy with a couple of connectors and a new section of tubing. Drip irrigation is the best method for watering landscape trees also. A tree with only 25 percent of its roots wet regularly will do as well as a tree with 100 percent wetting at 14-day intervals. This saves water in drought situations by wetting only part of the root zone. Thus a single lateral line is often sufficient for even large trees. Remember that the root system grows more vigorously in moist soil. If emitters are placed on only one side of a tree, the root system is not balanced and stability is threatened. In one experiment with drip irrigation, a large crop of trees was blown over in a storm because the roots had been watered on one side only. When watering closely spaced plants such as garden crops, flowers or shrubs using insert emitters, a system must have the capability to maintain uniformly moist soil near the surface along any row where you wish to germinate seeds. It is not feasible to place an emitter where each plant will grow. You do not use the same spacing for all vegetables and flowers and you must not grow the same kind of plant in the same spot year after year. All things considered, a spacing of 2 feet between emitters is best for most closely spaced plants and soils; a spacing of 18 inches might be better in very sandy soil. Water is not wasted with 2-foot spaces even if plants are set 4 or 5 feet apart. Roots soon penetrate the soil around the plant in a radius several feet from the stem, and absorb water from every cubic inch of this soil. Knowing the total length of a drip hose required allows you to buy a ready-made kit with emitters already inserted in the hose. Usually, hose length in these kits is either 50 or 100 feet. The better kits have a filter and flow control of some sort. Installing these kits is simple. Lay enough garden hose to reach from the house faucet to the area to be irrigated, attach the hose end to the coupling on the emitter hose and unroll the hose down the first row. At the end of the row, curve the hose back up along the second row and so on for remaining rows. If the kit has a Y hose for equal lengths of hose connected to each leg of the Y, put the Y near the center row at the high end. If there is extra hose, run the excess back over the last row. Taking one step at a time in customizing a drip system to fit your planting area is fun and easy. First, select an emitter that delivers 1 to 2 gallons per hour when operated in a pressure range of 2 to 10 pounds per square inch. One emitter commonly used in Texas is rated at 2 gallons per hour when operated at a pressure of 10 pounds per square inch. When operated at 2 pounds per square inch, this same emitter delivers 1 gallon per hour. In actual practice the emitter would be operating at a pressure somewhere between these two extremes. Emitter systems with insets irrigate most uniformly when the pressure in the hose along the row is maintained in a range of 3 to 6 pounds per square inch. The lower the pressure, the greater the effect of elevation changes. Water flow through a pipe is slowed by the friction it creates. That is why water flows faster from the emitter nearest the header and slowest from the emitter farthest from the header. Keep this difference as small as possible. Well-designed small systems can be operated with no more than 10 to 15 percent variation in flow rate. Design your system for a uniform flow rate by limiting the emitter hose length to less than 50 feet when the emitters are 2 feet apart on 3/8-inch hose. With row lengths of 60 to 100 feet select 1/2-inch diameter hose. If the 3/8-inch hose is used for runs up to 100 feet, a drop in flow rate of more than 25 percent from the head to tail of the hose will occur. Water is wasted at the beginning of the row to get enough water into the soil at the end of the row. If the garden is level, it is easy to shorten the length of run by placing the header in the center (halfway down the length of the garden). To keep the water volume adequate increase the diameter of the supply hose or main to 3/4 inch. If the garden slope is only slight and there are only a few rows, put the header on the high end. For steep slopes where rows must be contoured, run the header down the slope and the emitter hose across the slope with the contour. Now determine if the water supply is sufficient for the drip system to work properly. Count the number of emitters and multiply by the rated gallons per hour of the emitter. Divide this number by 60 to get the gallons per minute your water source must supply to allow the system to irrigate uniformly. For example, 100 emitters multiplied by 2 gallons per hour per emitter equals 200 gallons per hour, 200 gallons per hour divided by 60 equals 3.3 gallons per minute. If your water supply is 5 gallons per minute, design the header hose to irrigate the garden in one set; if your water supply is only 2 to 3 gallons per minute, divide the header into two sets using a tee with two shutoffs to permit irrigating each half of the garden separately. Select the proper size main and submain (header) hoses next. For flow rate up to 3 gallons per minute, 1/2-inch diameter hose is adequate for the main hose from the faucet to the header and for the header, too. When a flow of 3 to 6 gallons per minute is required to satisfy the emitter hose, the main hose carrying water to the header should be 3/4 inch in diameter and the header can be 1/2-inch diameter hose. For example, here is a hypothetical garden 20 feet wide and 30 feet long, with 25 feet from the hose faucet. It has six drip emitter hoses with emitters 2 feet apart in the hose. Starting at the house faucet, a drip system would require one 80-mesh hose strainer, 25 feet of 1/2-inch supply hose with threaded coupling, one 1/2-inch female swivel hose thread poly compression tee, 20 feet of 1/2-inch header hose, four male hose thread poly compression tees, six 1/2-gallon-per-minute flow control valves, 180 feet of 3/8-inch male hose compression couplings with caps, 100 emitters which deliver 1 to 2 gallons per hour and one twist punch. Include several repair couplings and a dozen hole or 'goof' plugs to help repair accidents. Row shutoffs and flow control valves can be omitted, but the system would be less versatile and less uniform in flow rate. Installing this emitter hose system requires only a knife to cut the hose and a twist punch or hand punch to install insert emitters. Some hose comes with emitters already installed, and the cost is only slightly more. Assemble the system starting at the house faucet. Lay hose from the faucet to the soil at the edge of the garden, leaving it slack. Sink wooden stakes in the soil to hold the hose and fittings where you place them. Measure pieces of header hose and push them into the compression fittings (tees) so that the drip hose lines up exactly with a center of the row. Then, punch a hole with the twist punch along the top side of the drip hose every 2 feet and press an emitter into each hole. Turn on the water to flush any foreign particles out of the end of the hoses. When the lines are cleaned, stop the water and cap the end of each drip hose. Now it's ready to irrigate. OPERATING A DRIP SYSTEM Operating a drip system is a matter of deciding how often to turn it on and how long to leave it on. The object is to maintain adequate soil moisture without wasting water by applying too much. Anyone can turn on a faucet for an hour or two every day, and some drip system manufacturers advise leaving systems on continuously for the entire growing season. Not all gardens, however, use the same amount of water daily. Knowing how often and how long to water depends on the system's rate of delivery, soil type, varying weather conditions, kinds of plants, their growth stage and cultural practices in use. Irrigating trees has the same restrictions. Water requirements are influenced by tree size and growth as well as rainfall, temperature, relative humidity and wind velocity. Ideal system operation applies just enough water to replace the amount used by the plants the previous day. Uniform soil moisture content is maintained and the volume of moistened soil neither increases nor decreases. Estimate daily operating time in hours by dividing the daily water requirement of each plant in gallons by the application rate to each plant in gallons per hour. Continuous irrigation may be required for short periods when water use by the plants is maximum, but continuous operation when it is not required offsets the basic advantage of minimum water application with drip irrigation. The object of each watering is to bring the moisture level in the root zone up to a satisfactory level. Any more means cutting off necessary oxygen along with the loss of water and nutrients below the root zone. The system is then run again before the satisfactory moisture levels in the soil is lost. If plants are showing signs of insufficient moisture and watering duration is long enough (see Table 5), then shorten intervals between watering. Table 5. Watering time (in hours) per irrigation.*
Table 6 give the amount of water various plants need under a range of temperature conditions. This is evapotranspiration. It considers the water used by the plant as well as the water evaporated. Plants need three to four times as much water in hot weather as they do in cool weather. Both tables are needed to calculate the number of waterings each week. Table 6. Irrigation time needed each week.*
Divide the amount of water needed per week by the watering time to determine the number of waterings weekly. For example, a closely spaced vegetable garden in medium soil needs to be watered for 2 hours at each watering, and with warm weather the garden needs 6 hours of water each week. Divide six by two and the answer is three waterings per week. The formula makes it easier to figure weekly waterings. Most home gardens have plants with various watering needs. This makes it difficult to give each type of planting optimum watering, but with some care results can be more than satisfactory. Plants with shallow root zones and shorter watering times benefit from more frequent applications. Other plants requiring deeper watering are satisfied by emitters with greater outputs, or in the case of clay soils, a greater number of emitters. Knowing the number of gallons delivered per hour by a drip system is also vitally important. If the delivery rate of a system is known, one can easily decide how long to leave it on to get the desired amount of water. For example, a typical system which delivers 15 gallons per hour to each 100 square feet of area irrigates at the rate of 1/4 inch per hour. Thus, you would leave the system on for 4 hours to get a 1-inch irrigation. To apply a 1-inch irrigation to a garden, run the system long enough to deliver about 60 gallons for each 100 square feet of garden area. Likewise, a system with a 30-gallon-per hour rate of delivery would do the same job in 2 hours.< To calculate the delivery rate of a particular drip system, read the meter again, subtract the first reading from the second and divide the total gallons per hour by the approximate number of units of 100 square feet in the garden. Divide the gallons per hour per 100 square feet by 60 to see what fraction of an inch is applied in 1 hour. Another method of measuring the volume delivered by one emitter in 1 minute is to use a measuring cup or graduated cylinder. Repeat this for several emitters and take the average. Multiply this volume by the number of emitters in the system to get the volume per minute. Multiply this volume by 60 to get volume per hour and convert this to gallons per hour. Again, divide your gallons per hour by the number of units of 100 square feet in the garden to get gallons per hour per 100 square feet. Probably the easiest method is to install an inexpensive water meter with automatic shutoff on the faucet. Then attach the hose which carries the water to the header pipe. Set the water to the header pipe. Set the meter to deliver the number of gallons needed to apply in inch of water. This volume would be 60 times the number of units of 100 square feet in the garden. Turn on the water and stay nearby to record the time it shuts off. The elapsed time is how long it took the system to deliver the inch of water. For newly seeded gardens the system should be run only a short time every day for a few days to keep the surface soil from drying out. Plants loaded with fruit will need an inch of water every other day. Most people new to drip irrigation notice immediately that the soil surface is dry except for a circle of moist soil right around the emitter. The wet circles overlap where emitter holes are closely spaced. Two examples are the Bi-Wall and Twin-Wall hoses. Moist surface soil is desirable only when germinating seed. At other times it is a waste of water because tremendous quantities evaporate from a wet soil surface. The small circle of moist surface soil around a drip irrigation emitter is like the tip of an iceberg, because after a few hours of irrigating a great volume of water under the emitter has spread out through the soil for several feet in all directions. The water which falls gently from the drip hose into the soil is pulled downward by gravity. It is also pulled sideways, moving from one tiny soil particle to the next by a force known as capillary attraction. The slower the water flows into the soil, the greater is its sideways flow relative to its downward flow. It is easy to see why water from a drip hose in the row spreads out several feet in all directions even though only a small circle of wetness on the soil surface is visible. Actually, the dry surface soil prevents moisture from evaporating into the air, thus conserving water. Very often after spring or fall tillage, especially rototilling, the soil is fluffy and very loose. This soil will not conduct drip irrigation water properly. Instead of spreading out and wetting the entire soil volume in the garden, the water travels almost straight down. A narrow column of soil will be waterlogged, but most of the surrounding soil remains dry. For tilled soil to regain its ability to conduct the water sideways, soil particles must settle back together after each spading, plowing or rototilling. Sprinkle irrigate an inch of water on the entire garden after spring and fall tillage to settle soil particles so that the soil will conduct water laterally as well as downward. An inch or two of rain also settles the soil. Sandy loam soils hold less water per foot of depth than clay loam soils. Water moves downward faster in sandy soils than in those with high clay content. Generally, water spreads sideways more in clay loam than in sandy loam soils, but there are exceptions. Some homeowners have added so much organic matter to their sandy soil that the water from an emitter travels outward in a circular pattern, wetting soil 3 feet away from the emitter to within 3 inches of the soil surface. In Texas, spring rainfall is often adequate to get plants started. In June and July rainfall is less, and higher air temperatures and longer days cause plants and soil to lose much more water into the air. Watch the weather and record the amount and frequency of rainfall, remembering that supplemental irrigation may be necessary even in a rainy week if the required amount has not been supplied naturally. The frequency of irrigation should increase as hot summer weather approaches. When temperatures reach the high 90's and humidity is low, fruiting tomato plants require irrigation every other day with at least an inch of water for maximum production. In the fall, with the return of more frequent rainfall and cooler temperatures, allow more time between irrigations. An inch every 5 to 7 days is adequate then. Inspect plants regularly to determine necessary adjustments in daily irrigation time. If the zone of moistened soil is increasing in size, reduce operating time; if the moistened soil zone is decreasing in size, increase operating time. The frequency and duration of drip irrigation also depend on the kinds of plants being grown. For instance, tomatoes use more water than any other vegetable in the garden when full grown and laden with fruit. Three to 6 gallons of water daily usually is sufficient for a tree during the first and second year after planting. Only 3 to 6 hours of irrigation time are required daily during maximum water use months if one 1-gallon-per-hour emitter is used at each tree. WATER RESPONSIBILITY Water is a limited and fragile resource. Each gardener utilizes a small part of the total water consumed, but the total use by all gardeners is significant. Irrigating home gardens and landscapes is considered a luxury use of water by many people. Non-essential use of water implies a special responsibility on the part of gardeners to efficiently use the resource and to protect its quality. This responsibility is fulfilled by following the recommendations in this bulletin concerning water conservation and to further avoid practices that contribute to surface and groundwater contamination. Among the threats to pure water are improper use of fertilizers, pesticides and soil erosion. Label instructions on all pesticides and fertilizers must be followed faithfully and water run-off due to excess irrigation should be minimized. GLOSSARY Abscission - The falling off or breaking off of a leaf or fruit as the result of a weak point which forms at a point on the petiole or stem. Bi-Wall drip tubing - A brand of drip tubing which has a small diameter plastic tube fused to the top side of a large diameter plastic tube. Water flows through the large tube and into the small tube through holes spaced every 4 to 6 feet. Water drips out of the small tubing onto the soil from holes spaced about 1 foot apart. This system allows water to be distributed evenly along a relatively long row of up to several hundred feet. Drip irrigation - The slow application of water, usually drop by drop, to the soil. Ear tee - A fitting used to conduct water from a given point along a header pipe into a length of Bi-Wall or Twin-Wall tubing. The ears are two semi-rigid loops of plastic that are looped over the header pipe to prevent the tee from being pushed out by water pressure. Emitter - A small fitting (usually in the size range of an aspirin to a spark plug) with a precisely formed orifice or channel in it. This emitter is plugged into flexible plastic pipe permitting water to flow out of the pipe at a very slow rate at any point along its length. Evapotranspiration - The combined loss of water from the soil by evaporation and from leaves by transpiration. Filter - A device which captures particles of sand or other matter which might plug orifices in the lateral drip lines. Fittings - Collectively, the parts of a drip system; pipe, connecting tees, valves, emitters, etc. Flow rate - The volume of water passing through a pipe or out of an emitter. Flushing - The process of washing captured particles out of a filter. GPH - Gallons per hour, a term which specifies the rate of water flow through a pipe or the amount of water delivered by a pump. GPM - Gallons per minute, a term which specifies the rate of water flow through a pipe or the amount of water delivered by a pump. Header - The length of pipe placed along the high side of the garden to conduct the water into the drip hoses, tubes or lateral driplines that are laid down along the row. Hose connector - The fitting connected to a plastic pipe or garden hose which has hose threads that match the threads on the house faucet. Irrigation - Application of water to the soil surface. Lateral drip lines - Lengths of plastic pipe or tubing, containing emitters or precisely formed orifices, laid down along the center of a row of plants. Line - Another term for plastic pipe or plastic tubing that is used to transport water along rows of plants or from tree to tree in a drip system. Line size - Usually the diameter of a particular pipe or tubing used to conduct water in a drip system. Moisture deficit - a condition in which a plant's requirement for water is greater than the supply available to it, thereby preventing the plant from reaching its full potential of beauty, yield and quality. Mulch - Generally, any organic or inorganic substance such as hay, lawn clippings, paper or plastic applied to the soil surface to prevent weed growth and water loss. Orifice - A precisely formed hole in a plastic pipe or tube or in a small fitting (known as an emitter) plugged into plastic pipe through which water flows out in drops or a tiny stream. Photosynthesis - The formation of glucose by the reaction of carbon dioxide and water in the green leaf. PSI - Pounds per square inch, a term used to specify water pressure to the amount of force pushing on the water in the pipe. Root zone - The location of most of a plant's root system in terms of lateral spread and depth. Run-off - Water that flows over the surface of the ground rather than penetrating the soil. Salts - Chemical elements in the form of dissolved ions that are carried in irrigation water and deposited in the soil when water moves into plants or evaporates from the soil surface. Soil texture - The relative amounts of sand, silt and clay present in a soil which places it in one of the textural classes: sand, loamy sand, sandy loam, silty loam, clay loam or clay. Soil tube - A hollow metal tube that is forced into the soil to remove a sample of soil. Soluble salts - Various naturally occurring or introduced salts such as sodium chloride and calcium which are dissolved in water. Sprinkler - A device attached to a hose to propel streams of water into the air, thereby distributin water evenly over a lawn or garden surface. Stomates - Tiny pores in the leaf surfaces (more on the underside) which open and close to allow carbon dioxide gas to enter and oxygen and water vapor to exit. Transpiration - The process by which water moves from the leaf into the air in vapor form. Twin-Wall drip tubing - A brand of drip tubing which consists of two plastic tubes, one inside the other, joined by a seam that runs along the length. The inner tube conducts the water along the length of the row. It flows into the outer layer of tubing through tiny holes spaced 4 to 6 feet apart. Then the water drips out of tiny holes formed every 12 to 18 inches in the walls of the outer tubing. SUPPLIES NEEDED This space is provided for you to list the supplies you will need to build your drip irrigation system.
The information herein is for educational purposes only. Reference to commercial products or trade names is made with the understanding that no discrimination is intended and no endorsement by the Cooperative Extension Service is implied. Educational programs conducted by the Texas Agricultural Extension Service serve people of all ages regardless of socioeconomic level, race, color, sex, religion, handicap or national origin. Issued in furtherance of Cooperative Extension Work in Agriculture and Home Economics, Acts of Congress of May 8, 1914, as amended, and June 30, 1914, in cooperation with the United States Department of Agriculture. Zerle L. Carpenter, Director, Texas Agricultural Extension Service, the Texas A&M University System. Hypertext markup and graphics colorization by Kimberly Mason and Dan Lineberger. |
||||||||||||||||||||||||||||||||||||||||||||||||||||||||||||||||||||||||||||||||||||||||||||||||||||||||||||||||||||||||||||||||||||||||||||||||||||||||||||||||||||||||||||||||||||||||||||||||||||||||||||||||||||||||||||||||||||||||||||
 The danger of exhausting valuable aquifers by excessive pumping
is paralleled by the threat of polluting the groundwater with
industrial, agricultural and home landscape contaminants. Nitrates
from excessive and untimely fertilization are especially threatening.
The danger of exhausting valuable aquifers by excessive pumping
is paralleled by the threat of polluting the groundwater with
industrial, agricultural and home landscape contaminants. Nitrates
from excessive and untimely fertilization are especially threatening.
 Mulching also reduces disease problems. Certain types of diseases
live in the soil and spread when water splashes bits of infested
soil onto a plant's lower leaves. Mulching and careful watering
reduce the spread of these diseases. Mulching also keeps fruit
clean while reducing rot disease by preventing soil-fruit contact.
Mulching also reduces disease problems. Certain types of diseases
live in the soil and spread when water splashes bits of infested
soil onto a plant's lower leaves. Mulching and careful watering
reduce the spread of these diseases. Mulching also keeps fruit
clean while reducing rot disease by preventing soil-fruit contact.
 wetting. And it is difficult, if not impossible, to protect them
with mulch. Train vining plants away from furrows even though
it is not an easy task. In areas with salty water, salts accumulate
near the center of the row and can injure plants. If only a small
volume of water is available, water a few rows at a time and then
change to a new set. This can be time consuming and wasting water
at the ends of the rows is a common problem.
wetting. And it is difficult, if not impossible, to protect them
with mulch. Train vining plants away from furrows even though
it is not an easy task. In areas with salty water, salts accumulate
near the center of the row and can injure plants. If only a small
volume of water is available, water a few rows at a time and then
change to a new set. This can be time consuming and wasting water
at the ends of the rows is a common problem.
 Liberal watering offsets the retarding effect of grass. If the
competition of grass for water can be overcome by extra watering,
plants will grow much better.
Liberal watering offsets the retarding effect of grass. If the
competition of grass for water can be overcome by extra watering,
plants will grow much better.
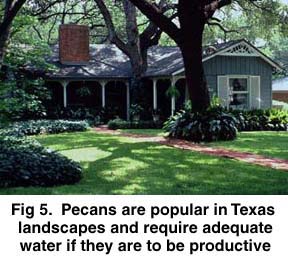 Growth of young, nonbearing pecan trees depends on a regular supply
of water from April bud break to mid-August. The frequency of
irrigation varies with the system used. However, avoid applying
too much water. An understanding of internal soil drainage prevents
overwatering. When too much water is supplied, oxygen is forced
out of the root zone and many serious problems result, including
the following:
Growth of young, nonbearing pecan trees depends on a regular supply
of water from April bud break to mid-August. The frequency of
irrigation varies with the system used. However, avoid applying
too much water. An understanding of internal soil drainage prevents
overwatering. When too much water is supplied, oxygen is forced
out of the root zone and many serious problems result, including
the following:

 in
the area to be irrigated. Usually a 5/8-inch hose is a sufficient
line size for normal gardens. Garden rows should be level or
only slightly downhill (not more than 1 to 2 percent grade)
even if it is necessary to run them on the contour (around the
hill instead of up and down it). Place small irrigation pipes
(drip hoses) right along the row; water drips out more uniformly
when the rows are level or slightly downhill. Transport water
from the source to the high side of the area to be irrigated.
in
the area to be irrigated. Usually a 5/8-inch hose is a sufficient
line size for normal gardens. Garden rows should be level or
only slightly downhill (not more than 1 to 2 percent grade)
even if it is necessary to run them on the contour (around the
hill instead of up and down it). Place small irrigation pipes
(drip hoses) right along the row; water drips out more uniformly
when the rows are level or slightly downhill. Transport water
from the source to the high side of the area to be irrigated.
 Ease of installation and durability are important considerations
in emitter selection. Most emitters are either connected in-line
or by attaching to the lateral. In-line connections are made by
cutting the pipe and connecting the emitter to the pipeline at
the cut. Clamps, which increase costs, are required for connecting
emitters in some pipes. Check the pipe and in-line emitters for
correct fit before purchasing. Emitters which attach to the lateral
are either inserted into the pipe or clamped to it.
Ease of installation and durability are important considerations
in emitter selection. Most emitters are either connected in-line
or by attaching to the lateral. In-line connections are made by
cutting the pipe and connecting the emitter to the pipeline at
the cut. Clamps, which increase costs, are required for connecting
emitters in some pipes. Check the pipe and in-line emitters for
correct fit before purchasing. Emitters which attach to the lateral
are either inserted into the pipe or clamped to it.